Take bulk actions on documents using Data Studio
- 08 May 2022
- 1 Minute to read
- Print
- DarkLight
- PDF
Take bulk actions on documents using Data Studio
- Updated on 08 May 2022
- 1 Minute to read
- Print
- DarkLight
- PDF
Article Summary
Share feedback
Thanks for sharing your feedback!
Once the data mapping in Data Studio is done successfully, you can do any of the following:
- Create documents
- Create and send documents for eSignatures (if you have mapped the signer’s email address)
- Create and send documents for acceptance
Follow these steps to create documents from Data Studio:
- Log in to your Revv account.
.png)
- Go to Templates on the left navbar.
.png)
- Open the template to which the data is mapped.
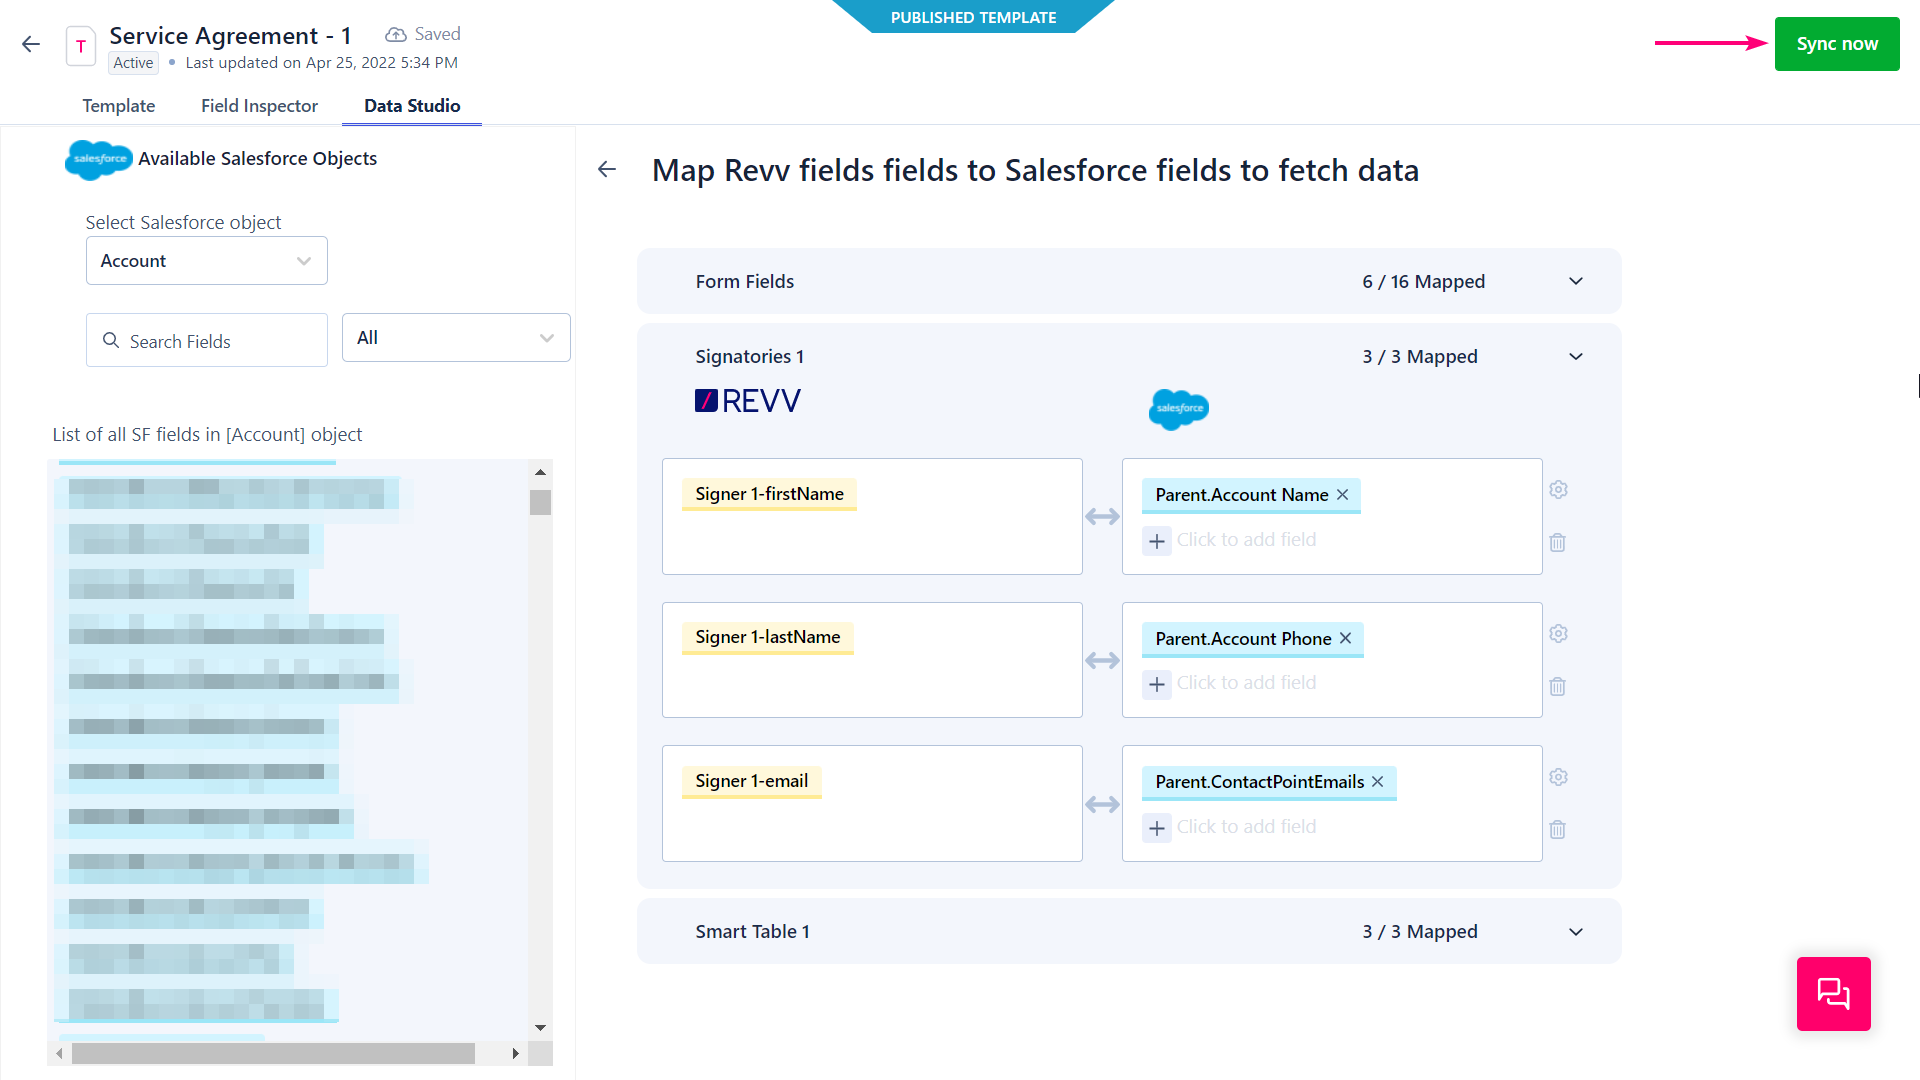
- Go to the Data Studio tab.
- Select your data source, and click Sync now on the top-right corner of the screen.
- In the list of data, click the checkbox and select one or more rows whose details must be used for document creation.
- Click + Create documents on the top right corner of the screen.
.png)
- In the Create documents in bulk pop-up window, under Step 1, click the —
- Create documents only option if you wish to only create documents
- Send for eSign option if you wish to create documents and send them for eSignatures
- Send for acceptance option if you wish to create and send documents for acceptance (also called a soft sign)
- Under Step 2, click the Change folder to select where the documents must be created. This is an optional step.
- Click Create Documents.
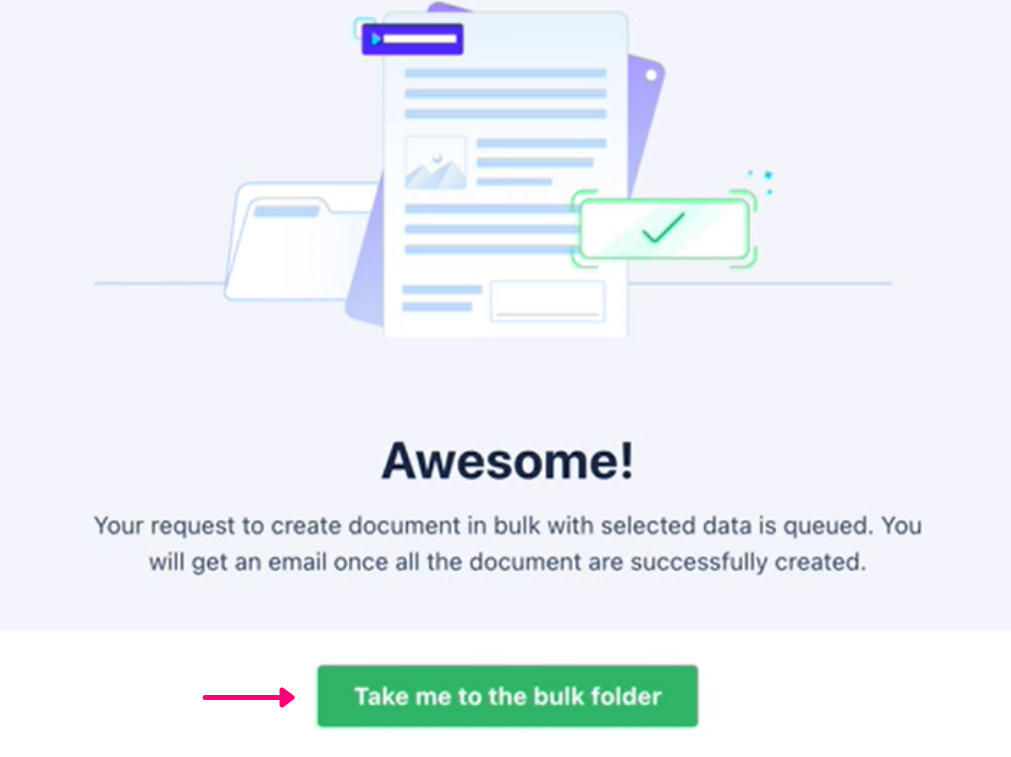
.png)
- Click Take me to the bulk folder to see the documents. This step will take a while, based on the number of documents.
.png)
.png)

.png)
.png)

In the folder, you can view the documents created from the template. When you open it, all the mapped form fields are filled with the incoming data from the data source.
| Note: If you have selected a primary field for a Revv field during mapping, then its value will be appended to the template name to distinguish one document from another. |

Was this article helpful?