Automating Workflows using Pipelines
- 23 Feb 2022
- 3 Minutes to read
- Print
- DarkLight
- PDF
Automating Workflows using Pipelines
- Updated on 23 Feb 2022
- 3 Minutes to read
- Print
- DarkLight
- PDF
Article Summary
Share feedback
Thanks for sharing your feedback!
Every business has its own workflow process. Revv enables you to streamline and automate your document workflow process for a seamless experience through Pipelines. It is a great tool to configure actions at each step of your document workflow.
Wondering how? Read along…
When you log in to your Revv account and go to the Pipelines page, click the Automate Workflow button from any pipeline. You can see that Revv provides the following three automation functionalities for each pipeline:
- Lane Transitions
- Lane Job-to-be-done (JTBD)
- Reminders
These three functionalities work on the pipeline level and automate your workflow with ease.
Let us learn about them one by one.

Lane Transitions
Lane transitions enable you to control the movement of a document in between lanes within a pipeline. You can configure lane transitions by adding lane events, an entry condition for the lane. These lane events are provided by default from Revv along with some lane transitions.
For example, you can configure a movement wherein if a document is eSigned, then it shifts to the Closed lane. Similarly, you can add new lanes and assign lane events to them.
The guiding principle is that the order of lanes in Pipelines should be aligned to your document workflow process
Follow these steps to configure lane transitions:
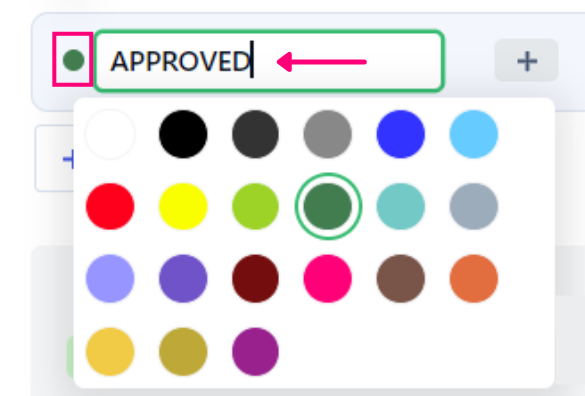
- Click + Add new lane.
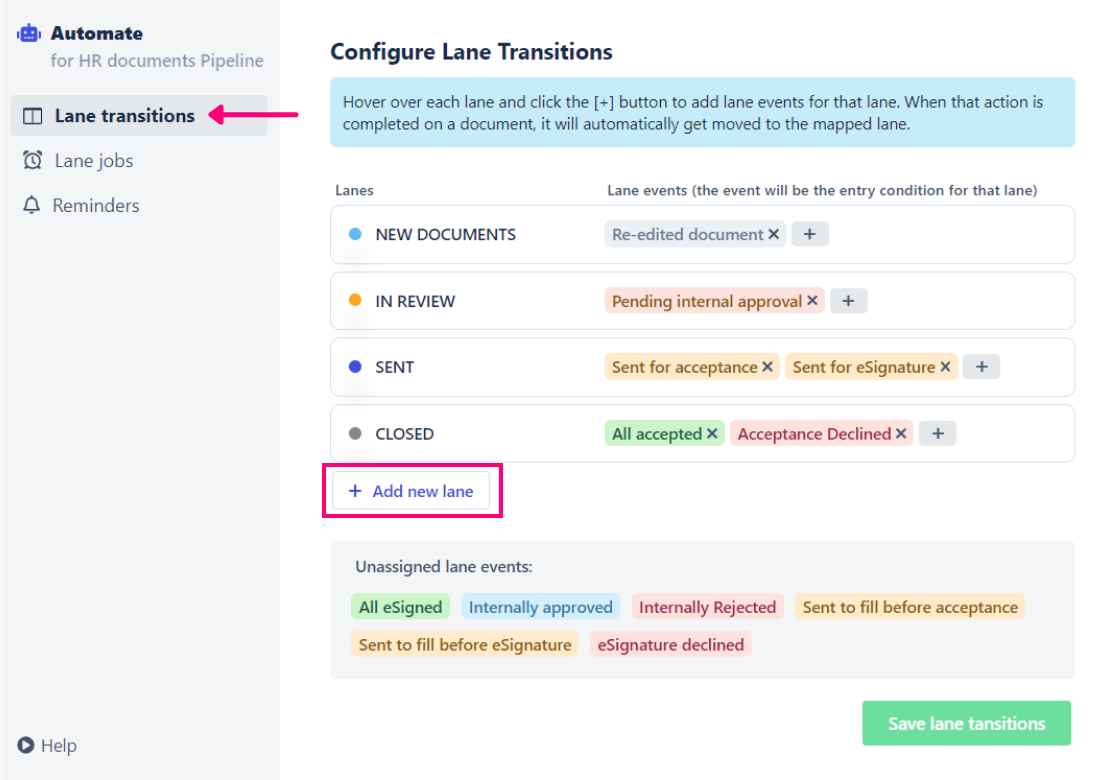
- Choose a color and provide a name for the lane.
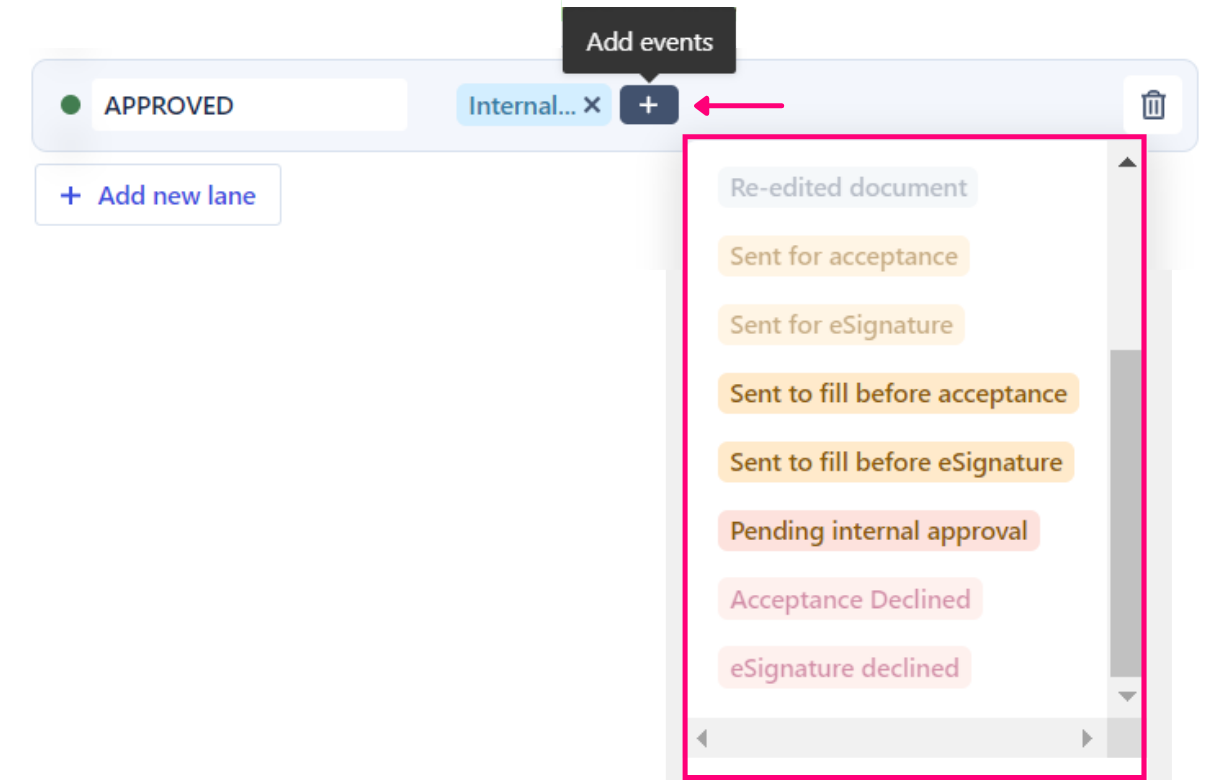
- Click the + icon to associate a lane event from the unassigned lane events box.
- Click the ✖ icon to disassociate an event from the lane.
- Click the Delete icon to delete the lane.

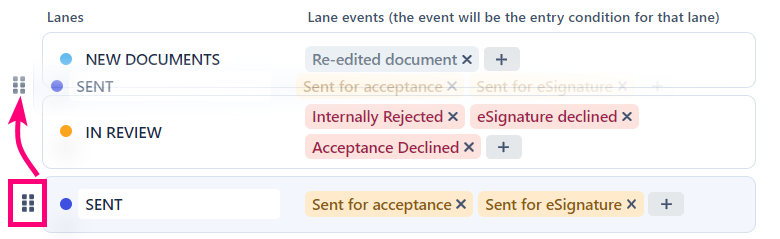
- Drag and drop a lane using the Grid icon to rearrange the lane order.
- Repeat the process for other lanes as well.
- Click Save lane transitions.


![]()
Now, when the document completes a lane event, it will be moved to the mapped lane. For example, whenever a document is in the ‘Internally Approved’ status, it will be moved to the ‘APPROVED’ lane.
Note:
|
.png)
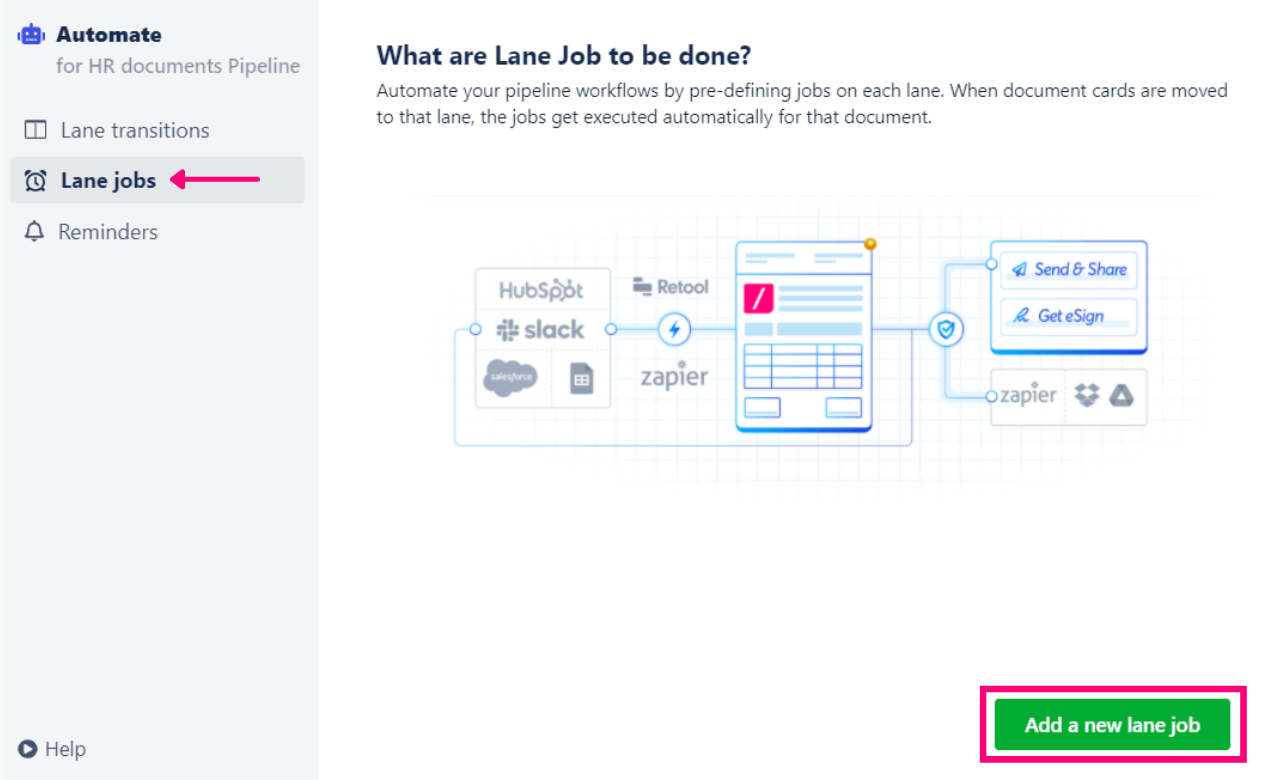
Lane Job-To-Be-Done (JTBD)
Lane JTBD enables you to add jobs to each lane that defines what must be done when a document enters that lane.
For example, you can notify your Accounts department when a quote is signed by the customer. You can configure as many jobs as you like. Revv gives you many job options to choose from.
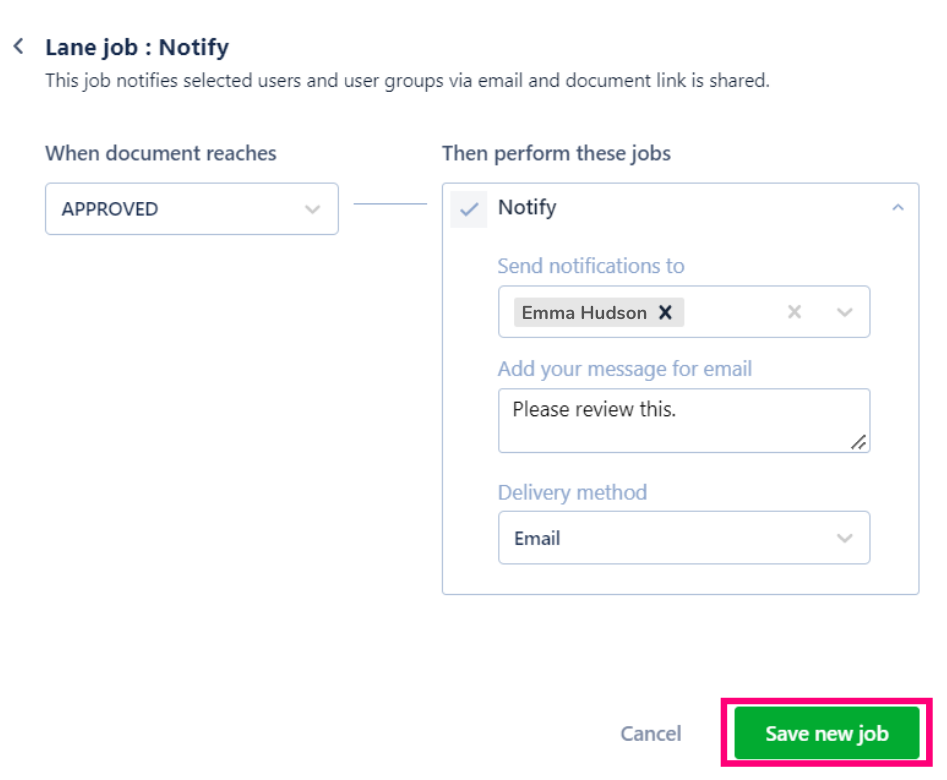
Follow these steps to configure Lane JTBD:
- Click Lane Jobs in the Automate panel.
- Click Add a new lane job.
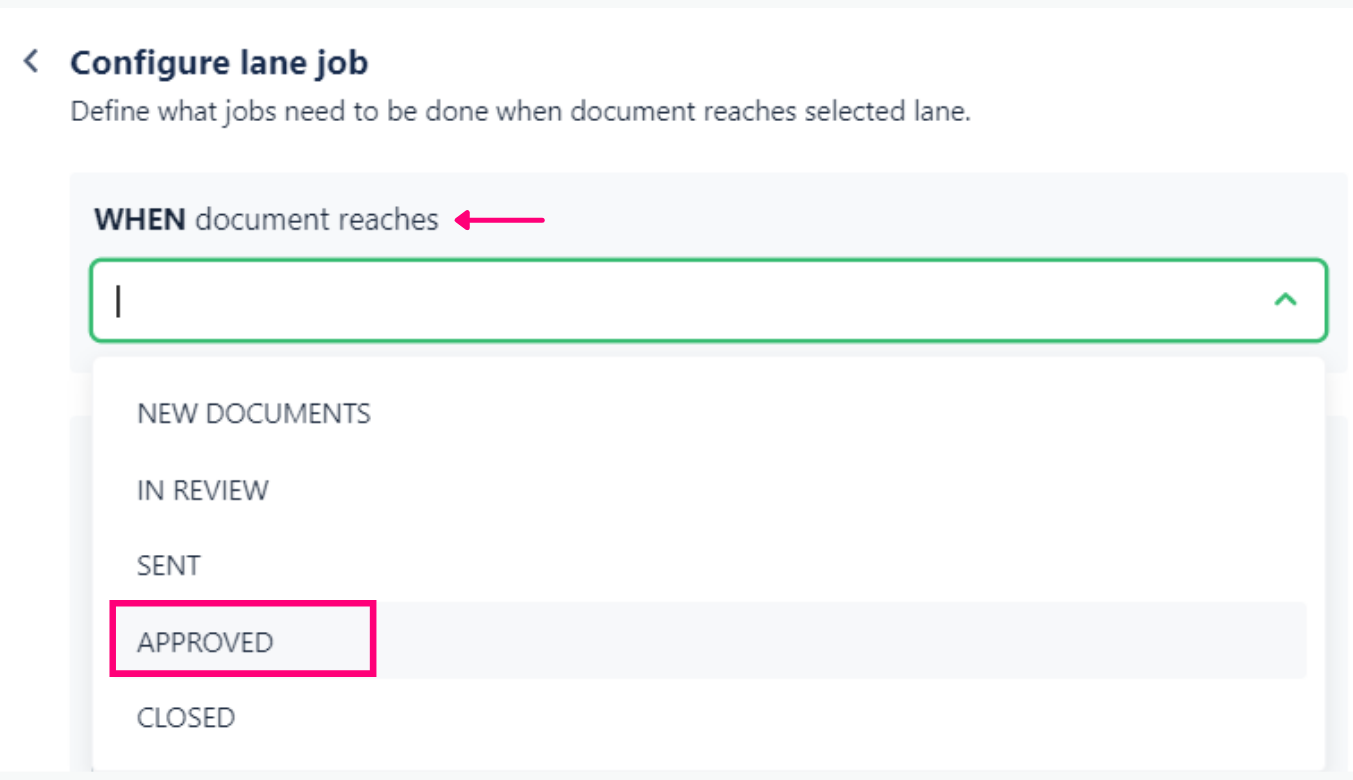
- Click When document reaches drop-down and select the lane.
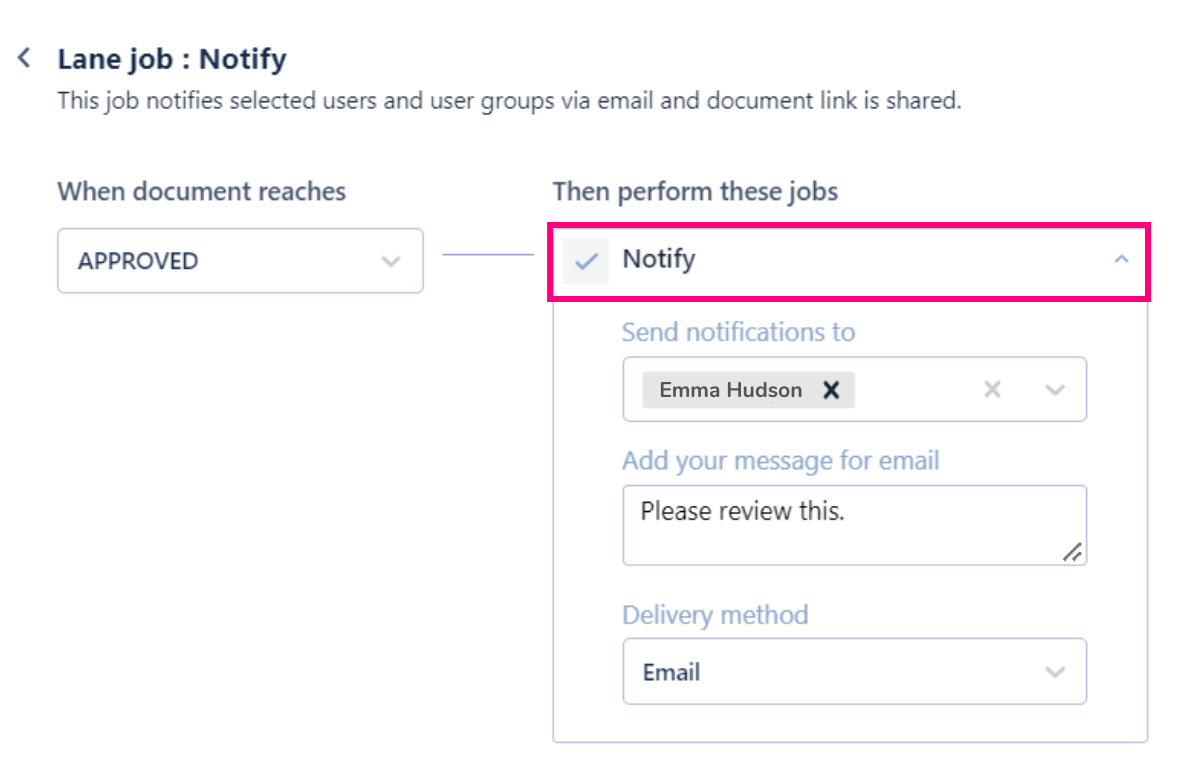
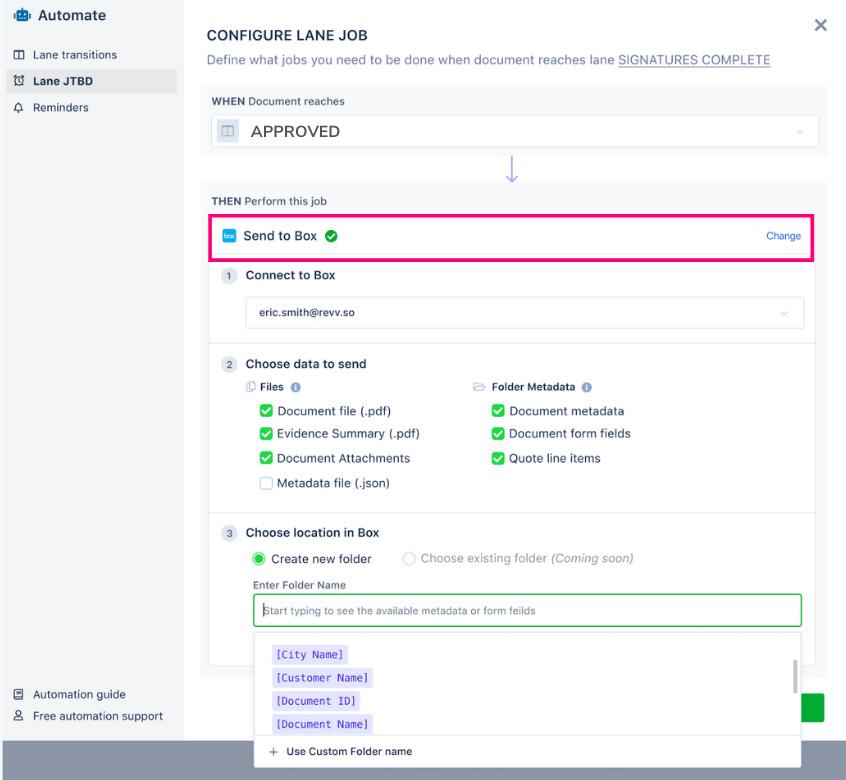
- In the Then perform this jobsection, you have two options:
- Notify - If you wish to send notifications to people once the document reaches the lane. This job notifies selected users and user groups via email and the document link is shared.
- Send to Box - If you wish to send the data to your Box account. This job creates a new folder in the selected Box account and sends the document pdf, related files, and data to that folder.
- Notify - If you wish to send notifications to people once the document reaches the lane. This job notifies selected users and user groups via email and the document link is shared.
- Click Save new job.
- Repeat the same process to add other jobs.


All your jobs will be listed in the Lane jobs panel. Now, the configured jobs will be executed when the documents enter that particular lane. For example, whenever a document enters the ‘APPROVED’ lane, Emma Hudson will be notified via email.

Note: You can edit or delete a lane job by clicking the More (⋮) icon. |
Reminders
Reminders are used to set up automated reminders for pending recipient actions. It is applied to all the documents that enter a particular pipeline. Reminders work on events provided by default by Revv.
For instance, if you have set daily reminders for Sent for internal approval event, the recipient will keep receiving the reminder till they approve the document.
Follow these steps to set up reminders:
- Click Reminders in the Automate panel.
- For an event, click the + icon under Remind Recipients.
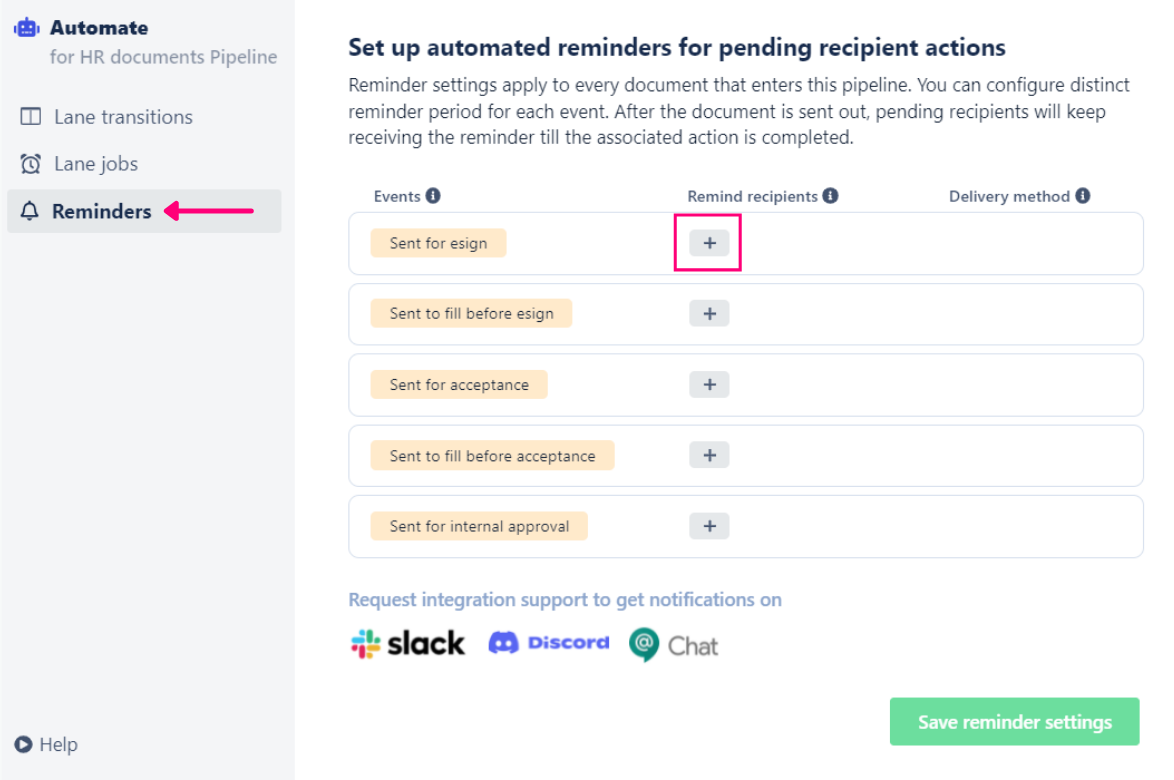
- Select the periodicity with which the recipients have to be reminded to complete the action.
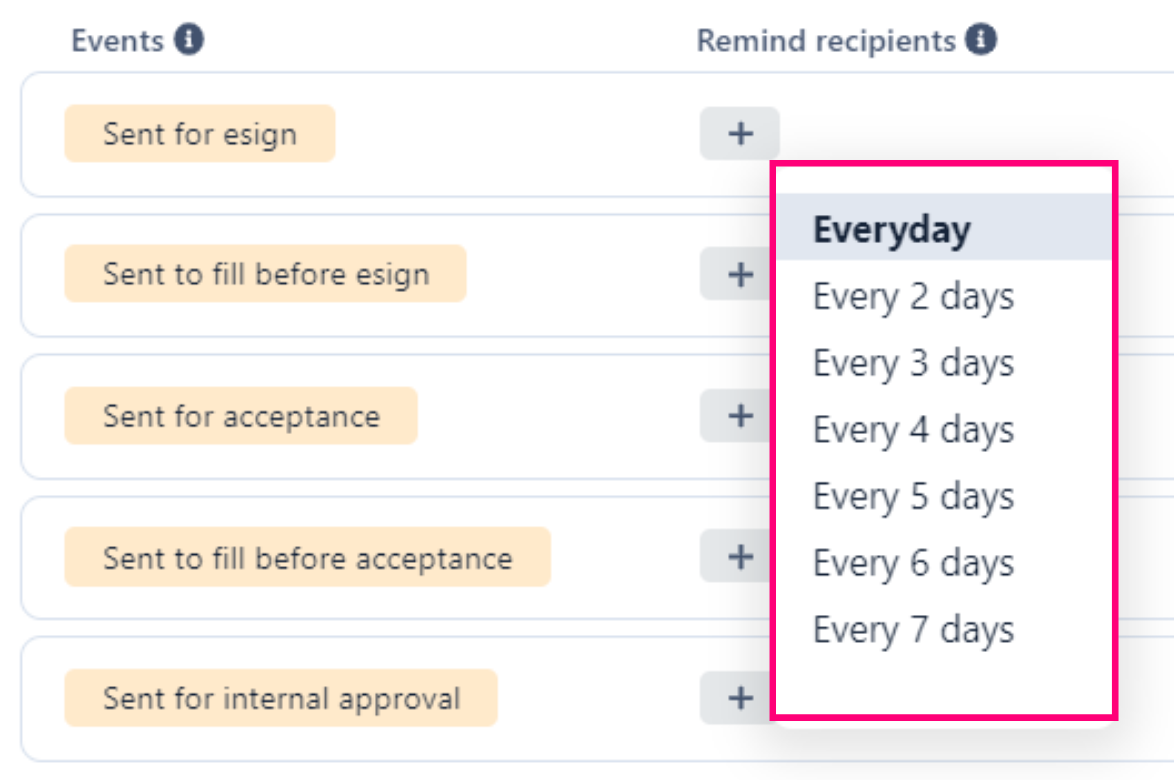
- Click the ✖ icon to cancel the period.
- Note: By default, the reminder will be delivered to the recipient via email.

- Repeat the same process for other events.
- Click Save reminder settings.


Now, the recipients will receive the reminder until they complete the associated action. For example, if Emma Hudson delays approving a document, she will be reminded every two days via email to approve the document.
Was this article helpful?